Monday 14th December
Final Title Sequence
I took me many weeks of planning and experimenting for me to be able to carry out my title sequence. This included from taking the photos, to editing, put the photos together and making the title sequence into a movie.
The first step of making my title sequence was planning this included the research and story boards which I have previously drawn out to show what sequence I am going to follow after carrying out research. All of this research can be found by going to the page Research into Existing Products. After looking back at the story boards I have created the final product for my animated title sequence will use all of the story boards I created apart from project idea 3. As I tried to create this idea on the sand animations and this was very unsuccessful, due to the movement of both the bat and the door at the same time, with animation I could not get this to work correctly.
After I had carried out animation mocks and samples which only last a few seconds in some of the animations such as animation sample 2 LINK this then meant that the title sequence needed to be lengthened therefore I used all of these ideas together.
The equipment I used to create my Mona the Vampire sand animated title sequence was as follows;
- light box
- black sand
- tripod
- camera
- stick
- pencil
- notes
After the planning stage I then had to set-up the light box, buy the black sand which I as going to use, set up the camera with a tripod. As well as carrying out a short test to see if the equipment was set up correctly.
I then started to take the 100 photos which have made up my title sequence. I did not intend to plan to take 100 photos, I similarly followed the story board that I had made and changed the sand a little at a time and then took a photo, were this had changed.
After the almost the entire day I took me to carry put the sand animation I then edited all 100 of the photos that had been taken for the title sequence animation. This was because the light varied photo to photo and were the sand had been moved there was not always a full sand background in every photo which was needed.
Since I have then edited all of the photos I then needed to put all of these photos together into a working movie, were all of the photos moved together to make a working movie. I did this on movie maker a windows media programme, use to make movies were you put photos into a system and they then get put together and move. To make sure that this is correct I had to check the timing settings to make sure that the timing was on the fastest speed possible so there was not a large gap between the photos, otherwise the movie will not work as the film with just show each photo and not a working movie.
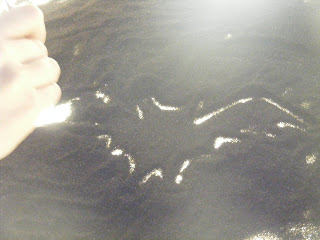
Example of a photo from the sand animation which has not been edited.
Example of a photo that has been edited for the sand animation title sequence.
I then checked the title sequence to make sure that pictures run smoothly and that the setting were correct. This was also to make sure that the photos were in the right order and worked well together to see if any photos were also too similar and then needed to be taken out of the title sequence.
After creating and putting together my development Mona the Vampire title sequence as shown below, I then needed to add music. The video below is a video of my basic title sequence without music. This video below is the main part of my main task of the title sequence. The photo to the right shows myself carrying out the sand animation.
Movie marker
I then added the audio which I am going to use for the title sequence. As I already had this audio in an mp4 file, I then had to change this file to an mp3 music file, so this could be used and put on my animation. This animation was then complete and I then had to save my movie as a whole and not individual photos and audio, I was unsure that this had to be done, therefore I had to find out how this had to be carried out on movie maker.
- discuss equipment used
-how did you set up animation
- show photos
- use screen grabs to show process?
- final animation editing examples, explain each stage, through power point on slide share
- final animation
[slideshare id=11944022&doc=howicreatedmymonathevampiretitle-120309142302-phpapp02]


